Flash Photography 101
Written by Daven Mathies
Flash photography is a scary subject for many beginning photographers, but even for experienced shooters it can lead to headaches. As for myself, I fought with flash for many years before it finally started to make sense. Understanding not just how to properly expose your flash photos, but also how flash is inherently different from ambient light, is key to creating solid images with your speedlight. If you have a DSLR camera and have been afraid to delve into flash photography, then this guide is for you, whether you’re the family photographer, a weekend warrior, or an aspiring professional.
So you purchased a shiny new DSLR only to find out your indoor flash pictures create the same “deer in the headlights” look in your subjects’ faces that your old point-and- shoot camera did. Set on remedying this problem, you picked up an external flash. With renewed confidence, you mount your new flash on your camera’s hot shoe, aim it at your subject, and blast away...only to find you get the same result. I’m guessing at this point you decide simply to stop using flash altogether, raise your ISO to the stratosphere and set your shutter so slow that dinosaur bones turn into oil while it’s open. And then you just suffer through grainy, blurry images. Yup, problem solved.
The truth is not all flash is bad. In fact, when used properly, flash can not only improve your photos objectively, but even add some creative flare not possible with other kinds of lighting.
I’m going to start with the basics: how to achieve an even, soft, natural light from your external flash (also known as a “Speedlight” or “Speedlite,” depending on if you’re a Nikonian or a Canonite.) While there are ways to improve the quality of your built-in flash, I will not be going over those here. Also, let me clarify that I am writing specifically for people who have a DSLR camera, but most of what I mention will be directly applicable to any camera that can accept an external flash. I am also assuming you already have a cursory knowledge of how to control your exposure, and a working vocabulary of camera jargon. Still with me? Let’s roll.
Don’t be the paparazzi.
We’ve all seen them: blood-thirsty photographers lining the red carpet, firing their bare- bulb flashes directly into the faces of celebrities. They’re professionals, so they must know what they’re doing, right? The first rule of flash photography is never point your flash directly at your subject.* If you do this, you are essentially turning your $1,000 DSLR and $400 flash into a $200 point-and-shoot camera. Skin tones will be washed out, objects will cast harsh shadows, your subject will appear “flat,” and people will get annoyed at you for flashing them. To fix this, we need to soften, or diffuse, the light. The first way to do this is aim the flash somewhere else.
You’ve probably noticed that your flash head can tilt and rotate. Chances are, most of the time you will be using a flash will be indoors. And, chances are, when you’re indoors you’ll be somewhere with either a white ceiling or white walls. If you have a white ceiling, try tilting the flash head directly up. Now, when you depress the shutter button, your flash will fire upward, the light bouncing off the ceiling and spreading out as it comes back down. This will “paint” the entire room in a soft, even light. It will completely remove harsh shadows yet still illuminate your subject. The result will be an image that does not necessarily look like it was shot with a flash. This technique is called, quite simply, “bounce flash.” Try bouncing your flash off different surfaces (walls, doors, mirrors, go crazy) and see the different results you get. So what about when you don’t have a good bounce surface, say when you’re outside or in a large building with ceilings that are too high for your flash to reach? That’s when you need a diffuser. Essentially, a diffuser acts in the same way as a white ceiling: it provides a larger surface of light (compared to the bare flash head,) the result being a softer output. There are many different flavors of diffusers, and there are some better suited than others to particular situations. I will go over a few of the more common ones below, their differences, and their uses.
The Sto-Fen Omni-Bounce.
 The Sto-Fen Omni-Bounce is perhaps the most notable brand of “cap” diffuser, although many flashes include one straight from the manufacturer. Perhaps this is why this is generally the one type of diffuser that novice Speedlighters are aware of. It is small, light weight, inexpensive (around $15), and easy to carry with you (you pretty much never have to take it off your flash). However, of all the diffusers I list here, it is probably the worst in terms of the quality of light it produces. It is simply too small to provide sufficient diffusion, and often leads to only slightly-less-harsh shadows than bare-bulb-in-your-face flash. Despite the benefits of price and size, I am not a huge fan of the Omni-Bounce diffuser simply because, well, it doesn’t do a whole lot. I found it actually works best for outdoor fill flash, when there is not a wall or other backdrop directly behind your subject.
The Gary Fong Lightsphere.
 Commonly referred to as “tupperware,” the Gary Fong Lightsphere is a wildly successful plastic diffusion solution. It features a bulbous “cup” with a removable lid. The main benefit of the Lightsphere is that when you’re working indoors, it allows you to both bounce light off the ceiling (by removing the lid) and send a soft, diffused light directly forward onto your subject (via the cup). One of the problems with normal ceiling-bounce flash is that it often casts a small shadow in your subject’s eyes (as their hair/eyebrows/eye sockets block the light coming from above).The Lightsphere remedies this. When shooting outdoors or with a high ceiling, you can put the lid back on so as to not waste light out the top and save some of your flash power. The one potential problem of the Lightsphere is that it sends light all over the place; you don’t have much control in directing it. The more obvious drawbacks are, of course, the size. It looks funky on your camera. You’re going to get some weird looks from people. Even if you’re a hired professional at an event where these sorts of things are common. But I digress... Also, even if you opt for the “collapsible” version, it’s not the easiest piece of equipment to squeeze into an already overloaded camera bag. And it runs about $50 for the standard universal version, which isn’t cheap. There are a few different ways to use it, as well as accessories like color-corrective lids, so some experimentation is required to figure out what works best in each situation—but put in the time, and you’re gonna like the way your flash shots look. I guarantee it.
The Rogue Flashbender
I’m not going to lie: this is my new favorite flash modifier. I used the Lightsphere for years, but the $40 Flashbender is far more badass. Fundamentally a simple bounce surface, the Flashbender sits just behind your flash head and bounces the light forward. Like the Lightsphere, it allows you to send light forward and bounce it off a ceiling at the same time. However, unlike the Lightsphere, it does not spread light all willy-nilly about the room. It is made of a highly reflective, shapeable, optically white surface that ensures you get maximum power efficiency and a true white light. If you don’t want to bounce off the ceiling, you can add an optional $20 diffusion panel to the front which serves the double purpose of cutting off the upward-bound light and further softening the light shooting forward. Rogue also has a myriad of other accessories available, such as gels and grids, so you can really get down and dirty with your flash photography if you want to. The diffusion panel almost seems like a requirement for the type of work I do, so I’m including its cost in my overall evaluation of the Flashbender’s price—which at $60 makes it the most expensive of the diffusers reviewed here. However, because it folds flat and can fit into almost any pocket in a camera bag, it’s almost as easy as the Omni-Bounce to take with you. And as it gives comparable light quality to the GaryFong, yet with more control, I conclude it to be well worth the price.
The Venerable 3x5 Card.
Camera salespeople may be reluctant to tell you this, but the folks down at Office Depot also sell some very capable diffusers (well, bounce cards, technically). They’re called 3x5 index cards, and you may have made flashcards out of them for Biology class. (It’s a flashcard, get it?**) Truth is, a simple 3x5 card rubber-banded to the back of your flash head can provide 80% of what the Lightsphere or Flashbender can do, at about 5% of the price (for a pack of 100!) If you don’t have the money for a “real” diffuser, seriously give this a shot. You probably have one lying around the house. Try to find one that is as close to pure white as possible, as the off-white cards will cast a different color temperature and may confuse your camera. In many real-world scenarios, I would actually choose this over the OmniBounce. Of course, it won't work at all in the rain...
Forget what you know about exposure:
flash vs. ambient light. 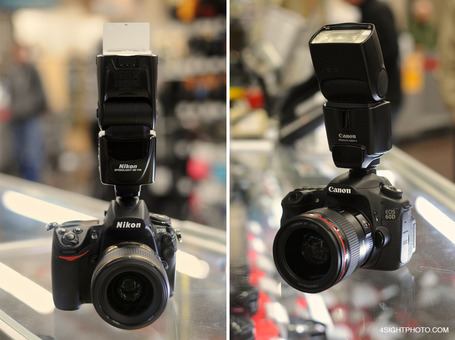
If you've ever been around a studio photographer while they are working, you may have heard them call out things like "F-five-six" while checking their strobes with a light meter. You probably haven't heard them say a shutter speed; only the aperture. Wonder why that is? Before understanding how to set your camera and flash for a correct exposure, it’s important to understand that the light cast by a flash is a completely different beast than ambient light. Whether you’re accustomed to working outdoor under the sun, or inside with fluorescent or incandescent light, you have likely grown comfortable with how your exposures change when you make adjustments to your shutter speed, aperture, and ISO. You know, for example, that a shutter speed of 1/125th of a second will let in roughly half the amount of light as a shutter speed of 1/60th of a second. You also know that anything much slower than 1/60th of a second will result in blurry images (image stabilization/vibration reduction aside).
This is fine and dandy when working with constant light, but guess what? Your flash doesn’t care. That’s right, whether you’re shooting at 30 full seconds or 1/250th of a second, your camera can see exactly the same amount of light from your flash. This is because a flash is only "on" for 1/1000 to 1/40,000th of a second (depending on output power). Not only will your camera's sensor receive the same amount of light from your flash regardless of shutter speed, but the flash will freeze any action that would normally be blurred by a slow shutter speed. Aperture and ISO are the only variables that we can use to control the amount of light the camera will see from our flash. And this is the basis for how to balance your exposure between flash and ambient light: use aperture to control flash and shutter speed to control ambient light. Keep in mind, your aperture setting (and ISO, for that matter) will also affect the ambient light, so any change there may require a change to shutter speed to compensate.
Your shutter speed doesn't affect flash, but flash affects your shutter speed. Wait what? Yes, you read that right. If you're familiar with shooting your camera in manual mode, you may have noticed when you put a flash on your camera that you suddenly couldn't choose a shutter speed faster than 1/250th of a second. This is because DSLR cameras employ what's known as a rolling shutter. The shutter is made up of a leading and trailing curtain: the first one opens the gate, the second one closes it. That's cool and all, except that after you reach a certain shutter speed (1/250th on most cameras) the trailing curtain starts moving before the leading curtain has finished, meaning the entire surface of the sensor is not being exposed at the same time. Ambient light doesn't care one bit, but for a flash firing at around 1/8000 of a second, this is bad news: it can't expose your entire sensor. Man, wouldn't it be cool if you could use a flash and shoot at a high shutter speed? Oh wait, you can! With a modern speedlight and camera, you actually have a way to bypass your sync speed limit. If you elect to turn "high-speed sync" on, you will be able to shoot with a flash at any shutter speed.
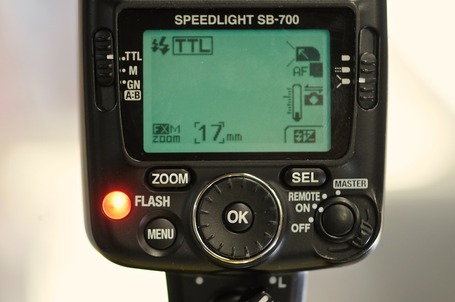
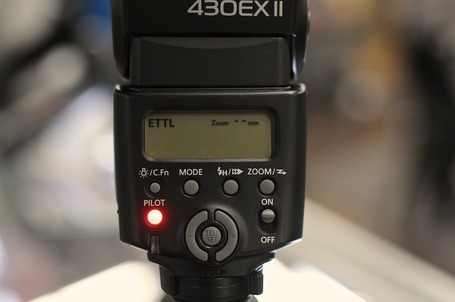
Modern speedlights are capable of pulsing their output over the duration of the rolling shutter to achieve an evenly-exposed result. This means that, yes, you can shoot outdoors in sunlight with a wide aperture and still use fill flash. There is a lot of math that goes on here to make this work properly, and I admit that I don't understand it. But it works. (If you do elect to use high-speed sync, keep in mind that you will not be able to get full flash power at shutter speeds that require your flash to "pulse.") Flash vs. camera exposure modes. Just like your camera, your flash has its own exposure modes. If you want the machines to do everything for you, set your camera to Auto or Program and your flash to TTL. TTL stands for through the lens metering. You camera's light meter will take in the ambient scene as well as light from a pre-flash to determine the output power of your speedlight. This generally doesn't lead to aesthetically pleasing results, but technically you will get a correct exposure.
I've found leaving a camera in any automatic mode will result in the background being too dark and the foreground—lit by the flash—being too light. But you know how to fix this problem. Put your camera in manual mode and use your shutter speed to balance your ambient light. My rule of thumb: take a test shot without flash and adjust your shutter speed until you get a pleasing result for your background. (Don't worry about going too slow—remember your flash will take care of freezing subject motion.) Then try a shot with your flash and see what happens. You should end up with a nicely balanced exposure: the background will not be too dark, and the flash will have popped just strong enough to fill in your subject. If you're in a situation where you're moving around, but remaining in the same room, this will guarantee you get a balanced exposure wherever you go: the flash will adjust its output based on your subject, but your camera will let in a fixed amount of ambient light so your background stays consistent. TTL mode will also allow you to set a flash exposure compensation.
Much like using exposure compensation on your camera when in Program mode, this will still leave the flash in automatic, but consistently under or overexpose by the specified value. Putting your flash in Manual mode will give you full control of its power, but keep in mind if the distance between you and your subject changes, you will have to adjust the flash power accordingly. This can be difficult in a situation like a birthday party or wedding reception. I shoot Nikon, and I find myself leaving my flash in TTL mode 95% of the time when it's on my camera. Nikon has a particularly good flash metering system, but I tend to shoot with a flash exposure compensation of -0.3EV. I know some Canon shooters who prefer leaving their flash in Manual because they don't trust TTL at all. I recommend trying it out both ways regardless of what brand you shoot.
And now the fun stuff.
A speedlight is far more than a simple way to provide light when there isn't enough. Not only will it give you a fill light on bright days, or allow you to shoot at slow shutter speeds without blurring your subject, but it can also give you images that simply aren't possible with constant light. Most midrange and pro level DSLRs have the option for doing "rear curtain sync" flash ("second curtain" is the term used by Canon). Recall the explanation of the rolling shutter: one curtain opens, then the next closes. By default, your flash will fire in sync with the first curtain. Setting your camera to rear/second curtain flash means your flash will fire in sync with—you guessed it—the second curtain. Now, if you're shooting at about a 1/60th of a second or faster, this setting won't matter in most situations. If, however, you shoot a slow shutter speed, using rear curtain sync will allow you to do some pretty neat things: your shutter will open, collecting all the ambient light, and then your flash will pop, freezing anything in its tracks. A fire dancer will be frozen in the middle of rings of flame; a car's tail lights will stretch out behind it as if it's going into warp. Those are just two of the more stereotypical examples you may have seen, but the possibilities here are endless. Knowing that your flash can freeze subject motion is awesome, but the lesser-known effect of this is that it can also freeze camera motion.
Normally, you probably try to hold your camera as steady as possible while shooting. Well, now you don't have to. In fact, go crazy, wave it all around, see what happens. This is especially fun in a party atmosphere if you have some other (constant) light sources in the frame: incandescent bulbs, Christmas lights, candles, whatever. Pan, spin, or—heck—throw your camera if you're up for it.* While the shutter is open, whatever light source is in the room will "paint" over your sensor, creating patterns of streaks, and then the flash will fire and freeze your subjects in the middle of it all. Try different shutter speeds to achieve different effects. And yes, you can leave your flash in TTL for this.
Learning how to master your flash will take time, but don't be afraid to experiment. Only with practice will this stuff truly begin to make sense. A flash is not a crutch; it is not a last-result option. It is a very powerful tool, and like all tools it can make or break a shoot depending on how it's used.
Keep it simple: Work with what you have.
Many digital SLRs from Canon and Nikon today have the built-in ability to trigger a remote speedlight using the camera's pop-up flash. You may not even be aware of this; I wasn't aware of it until several months after purchasing my first DSLR years ago. The technology is relatively new for Canon, who includes the function on three current models: the 7D, the 60D, and the Rebel T3i. Nikon's current lineup of compatible models are the D800, D700, D300s, D7000, and D90; however, there are many older models that also feature the ability (D300, D200, D80, and even the beloved D70 if yours still works.) You'll notice that some prominent offerings from both companies are missing from this list, such as the Nikon D3/D4 or Canon 5D and 1D series. This is simply because those models do not have a pop-up flash. Don't fear; you can add wireless flash control to any of these cameras by using a commander unit, such as Canon's ST-E2 or Nikon's SU-800, or a second shoe-mounted speedlight that has a commander mode (Canon 580 EX or EX II; Nikon SB-910 or SB-700. The now discontinued SB-900 and SB-800 also feature commander modes.)
Wireless flash control can also be brought to most lower-end SLRs in the same way. To activate commander mode on your camera, you will need to a do a little menu digging. The menu will be different depending on the make and model of your camera. With Nikon, you'll be looking for the "Commander mode" setting for your built-in flash. Canon prefers using pictographs, which may seem confusing at first. You will also have the option to allow your pop-up flash to affect your image, or only trigger your remote flash. I recommend the latter, as pop-up flash is rarely a flattering look. If you are using a shoe-mount speedlight as your commander, you may wish to allow it to affect your exposure depending on the effect you're going for. I also recommend consulting your manual for a detailed explanation of how to set up your camera for wireless flash control. You will then have to set your speedlight into "Remote" (Nikon) or "Slave" (Canon) mode, which may also require some menu digging depending on which model flash you have (the latest Nikon flashes have a simple position on the power switch for both "Remote" and "Commander." Remember, when it doubt, consult your manual.)
If you're familiar at all with studio lighting, you've probably seen moonlights and strobes with an optical slave ability. An optical slave allows a remote studio light to fire in sync with a master light connected to the camera. It's important to understand that, while some speedlights do have an optical slave setting, the wireless flash control I'm talking about here is much more advanced. Your remote speedlight is not simply reacting to the light emitted from the camera's pop-up flash, but is actually receiving a very detailed set of instructions in a split-second. When you press the shutter button on your camera, your pop-up flash (or external commander unit) sends a brief infrared pulse of information that communicates metering, flash exposure mode, and power information to your speedlight before the shutter opens. Then, when your shutter opens, your flash is ready with all the information it needs to create the proper exposure.
Whether you want your flash to to fire in TTL mode or full manual, you will set this not on the flash itself, but within the flash control menu of your camera or external commander unit. If you have multiple remote flashes, you can also set up different "groups" so that not every remote flash has to fire at the same settings. You can set Group A to Manual at 1/4 power, and Group B to Manual at 1/8 power, for example. You can even set one group to TTL and have another on Manual. Furthermore, you will still be able to use high-speed sync just as if your flash was on camera. Using this system, everything is controlled at the camera, which means you can make adjustments on the fly without having to walk over to your remote flashes to change settings. This has helped me on many occasions to not look like an idiot in front of an impatient subject. If you were, like me, surprised to find that such an advanced wireless light control system existed in your camera, then you may be thinking "Holy cow, this is great!" While I certainly don't want to stifle your enthusiasm, I feel I need to draw attention to the imperfections of the aforementioned system.
Whether you're using the pop-up flash, a shoe-mounted speedlight, or a ST-E2 or SU-800 as your commander unit, the way your camera communicates with your remote flash is the same: via an infrared signal. This means that, like a TV remote, your camera has to have a clear line-of-site path to your remote flash. Other infrared sources, such as the sun, can cause interference that prevents the system from working reliably. Your range will also be limited. Again, don't fear: there are several options available to improve the reliability of your wireless flash system regardless of whether you're outdoors, in a different room from your flash, or underwater. (Okay, maybe not that last bit—at least not without some serious watertight cases for your gear).
Enter the radio trigger.
A radio trigger acts as a link between your camera and a remote flash. Using radio waves, instead of infrared light, allows the signal to pass through walls, go around corners, and maintain reliability in direct sunlight. There are two basic styles of radio trigger when it comes to using speedlights, which I refer to as "dumb" and "smart." A dumb trigger will require you to set your remote flash in manual mode (not remote/slave mode) and will only communicate the basic "pop" signal from your camera. All power adjustments will have to be made on the remote flash itself, and you will not be able to take advantage of TTL metering or high-speed sync. Dumb triggers have the advantage of being lower priced, an advantage that is magnified when you have multiple remote speedlights as you will have to buy a separate receiver for each flash. The Phottix Strato trigger set costs about $80 for both a transmitter and a receiver, and extra receivers can be purchased individually. While the Strato is a "dumb" trigger, it does offer the unique feature of TTL passthrough if you also want to use an on-camera speedlight on top of the transmitter. The PocketWizard Plus II (soon to be replaced by the Plus III) is more expensive, at about $170 per unit. Each unit is a transceiver, meaning it both transmits and receives. The PocketWizard Plus series is the de facto standard for studio lighting, but can be adapted to control speedlights with a simple cable. They are reliable, offer multiple channels, and hold up well. The RadioPopper JRx series, like the Plus II's, are designed with studio photographers in mind but can be adapted to trigger speedlights. The units, which cost about $170 for a transmitter/receiver set, are compact and reliable. Furthermore, you can purchase an additional accessory that will give you limited flash power control straight from the transmitter on your camera. It's not enough for me to consider it a smart trigger, but it is a solid choice for photographers on a budget who need more control. [caption id="attachment_672" align="alignnone" width="500" caption="PocketWizard TT1 with AC3 and TT5"] [/caption] Compared to dumb triggers, smart triggers will facilitate greater communication between your camera and remote flash, giving you the additional functionality of TTL metering, high-speed sync, and flash power control straight from the camera. PocketWizard offers a formidable smart trigger solution: the TT series. At about $200 for a transmitter (the TT1) and $230 for a transceiver (the TT5) they are certainly not cheap. The transmitter sits directly on your camera's hot shoe and translates the electronic TTL signal into a radio signal that it sends to the transceiver. Your remote flash shoe-mounts onto the transceiver, which sends it the appropriate electronic signal. Your flash doesn't know it's not on the camera. It took a good deal of reverse-engineering and testing for PocketWizard to make this work, and it works well. With the addition of the AC3 zone controller that mounts atop the transmitter, you can set up to three groups of flashes and control their power separately straight from the controller. You won't have quite the full level of control you get from Canon's or Nikon's native systems, but you will have much greater reliability. My personal favorite smart trigger, however, is the RadioPopper PX system. While not as intuitive to use as the PocketWizards, and a little pricier at $250 per unit, the RadioPoppers offer greater control. Rather than plugging into your camera's hot shoe, the PX transmitter adheres to your standard commander unit via either Velcro or gaffer tape technology (whether your commander be a pop-up flash, shoe-mounted speedlight, or dedicated commander unit). Unlike the PocketWizard, the RadioPoppers completely ignore the electronic signal produced by your camera's hot shoe. Instead, the transmitter picks up the infrared pulse from your commander unit, translates it into a radio signal, and sends it to the receiver. The receiver, mounted to your speedlight, retranslates the radio signal back to an infrared pulse that it shines directly on your speedlight's IR sensor. Whereas a flash on a PocketWizard TT receiver doesn't know it's not on the camera, a flash on the RadioPopper PX receiver doesn't know it's not using the native manufacturer's wireless system. This means that all the control you have with the native system is there, and you access it in the same way you always would: through the menu on your camera or commander unit. You don't need an additional zone controller. If, however, you are using a camera without a pop-up flash with wireless control functionality, you will need to buy some type of commander unit for the PX system to work at all.
It's a little mind boggling when you think about all the electronic sorcery going on inside a smart trigger in order to keep everything in sync, but they work at the speed of light. And apparently, the speed of light is still fast enough to keep up with anything your camera can throw at it: even when shooting at 1/8000 of a second with 1500 feet of space separating your camera from your flash (the maximum working distance for the PX system according to RadioPopper.) While the price for entry into the smart trigger system is high, the control and reliability you get from it can be hard to live without for serious shooters. If you're a more casual photographer, I highly recommend using your camera's native wireless flash control system until it fails you. It may never. If it does, look into a radio trigger.
Whatever system you ultimately decide on, getting your flash away from your camera can significantly improve the quality of your photos. Pick up a light stand and try out some new modifiers, like an umbrella or a soft box, and have fun!

